


Some women just have the innate ability to take a scarf, play with it for 30 seconds, and voilà! They turn it into the perfect retro-glamour turban. I, however, am not one of those effortlessly chic women. (I am the girl who attempted to paint my nails last night with the end result looking like i dipped each finger in the entire bottle of polish.) Thus, after spending countless hours on youtube trying out head wrap tutorials, I ended up with a hair tangled hot mess à la Amy Winehouse.
I decided to move to plan b: The turban headband. This is a nice compromise for those of you who are either scarf-wrapping challenged like me, or aren't ready to fully commit to the turban. I didn't see any I liked in stores, plus I felt guilty spending money on something that is very simple to make. On to today's DIY!
What you need:
-A piece of stretchy fabric/clothing you don't mind cutting up (I like the look of stretch velvet)
-Sewing machine or needle and thread
-Scissors
-1 pin
-Optional: Iron
-20 minutes
STEP 1:
Using the spread of your thumb to index finger as a measure, cut straight across the bottom of your shirt/blouse. (if using a piece of fabric, cut a piece long enough to wrap around your head twice) When you cut off the bottom, you will be left with a loop of fabric.
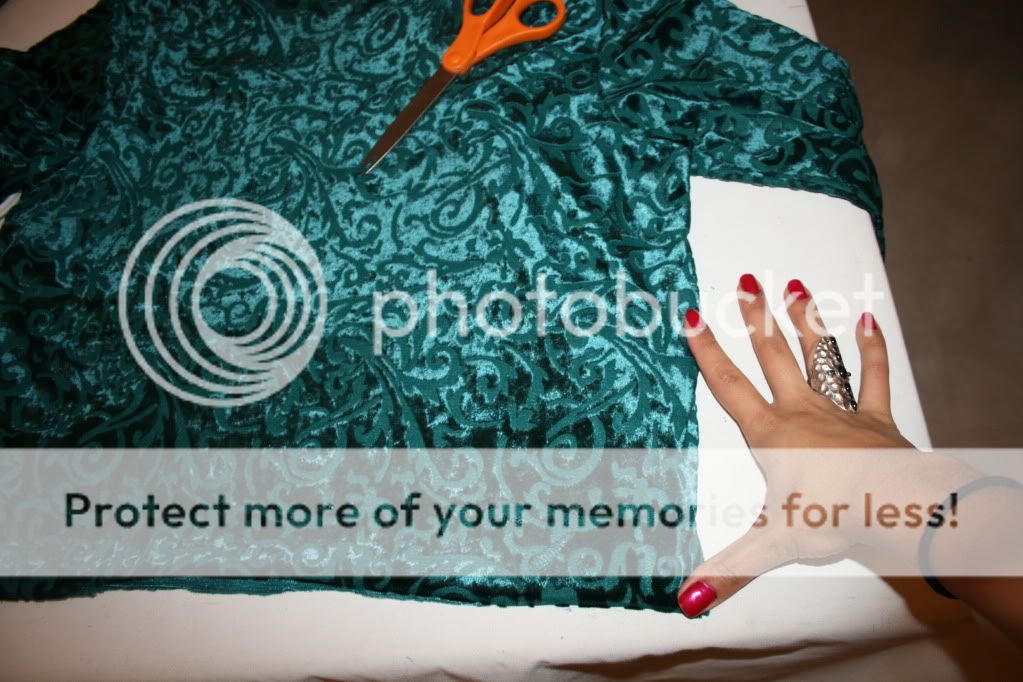

This is a shirt I got for $4 at the thrift store. The best part is there's still enough fabric left to make a bandeau top or just use as a crop top
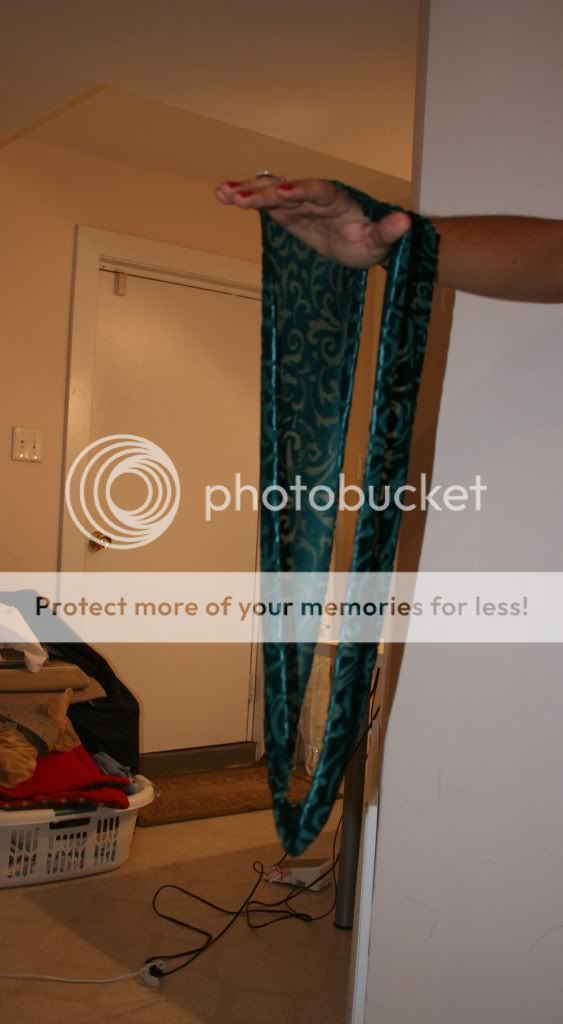
STEP 2:
Cut the loop open so you have one long rectangular piece of fabric.
STEP 3:
Lie your rectangle flat and fold it in half lengthwise so that the "good" side of the fabric is facing inwards. Optional: Iron the folded piece of fabric flat (I chose to do this because the ends of stretch velvet tends to curl up)


By the way, It's okay if your ends don't meet up perfectly. Remember, I'm from the school of quick and dirty sewing! It will all look good in the end.
STEP 4:
Sew the sides together lengthwise. You should now have one long tube of fabric. (I'm not sure what else to call it so it will hereinafter be referred to as the "fabric tube")

STEP 5:
Use your fingers to turn the fabric tube inside out.


STEP 6:
Starting from the back of your head, wrap the fabric tube across, up, over, and towards the back.

Starting from the back
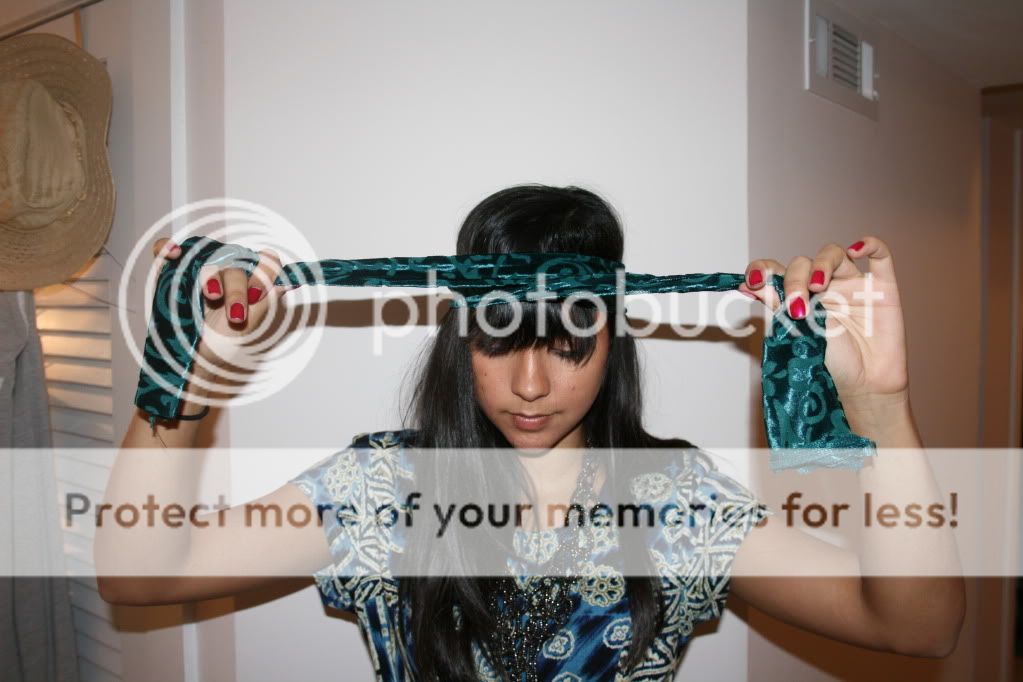
Pull the ends across

Up

Over

towards the back of your head
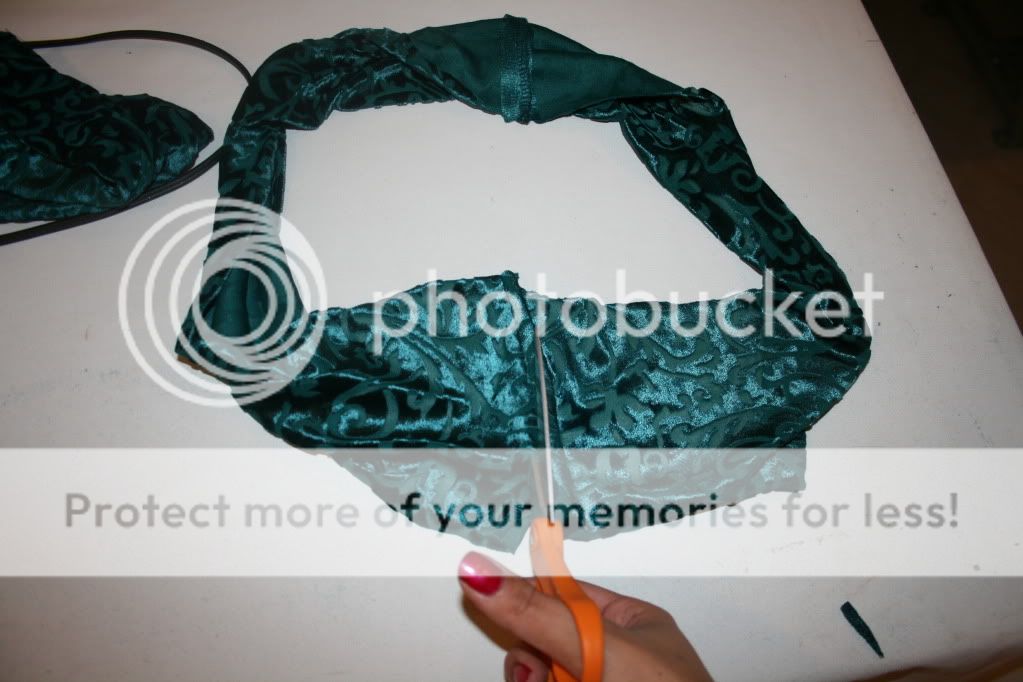
STEP 7:
Pinch the ends behind your head with with your fingers

STEP 8:
Keep the ends pinched as you pull the fabric tube off your head. Pin the ends together where you had them pinched.


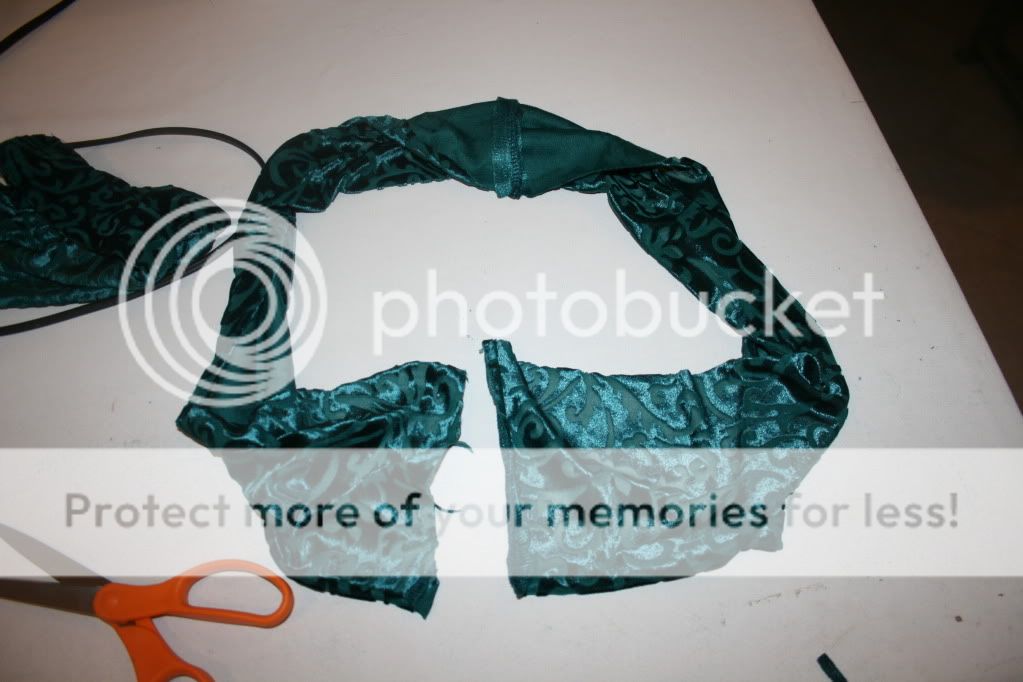
STEP 9:
Sew the ends of fabric tube together where you pinned them (width-wise) and cut off excess fabric. You will now have a loop.


STEP 10:
Take the ends you just sewed together and touch them to the part of the fabric tube that was at the back of your head. Sew these parts together width-wise. (If your fabric tube wrap came undone, re-wrap it using the technique in Step 6)
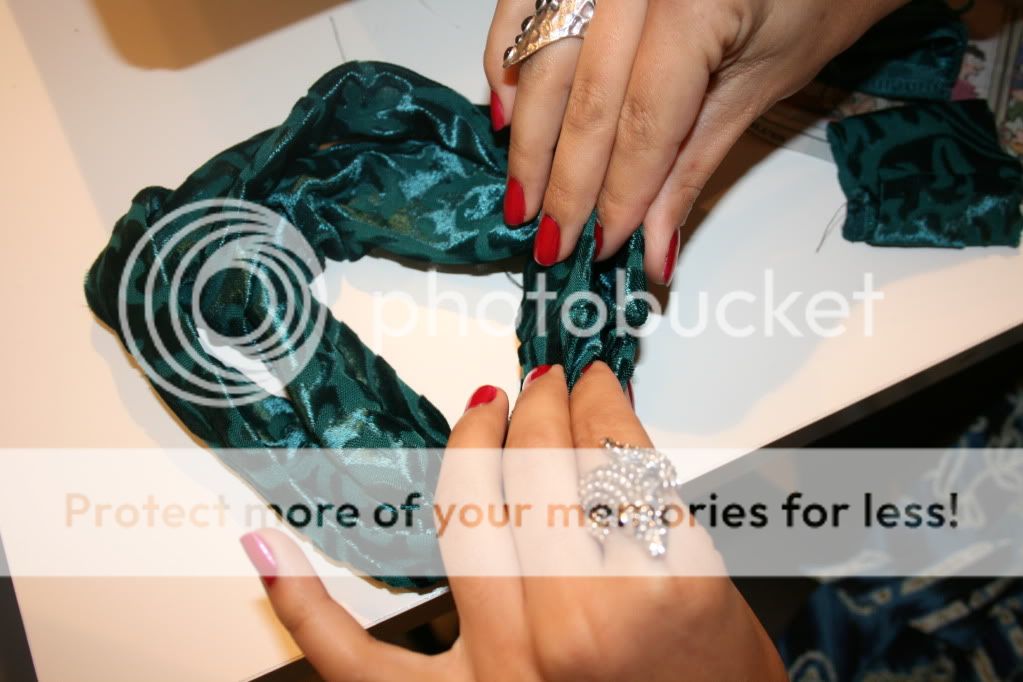

You should now have 4 layers of fabric sewn together.
Cut off any extra threads and you're done!


Dress- Thrifted, Tights- American Apparrel, Shoes- Rainbow, Jewelry- Laila Rowe and Forever21

The headband looks gorgeous with the dress. :) I have to try this myself!
ReplyDeleteVery helpful! I have some scrap fabric laying around, and I have been wanting to do this!
ReplyDeleteAmber
ambersmouthwash
Come check out my blog!
OMG I wish I was halfway decent at DIY, this looks amazing!
ReplyDeletegreat idea & great blog :)
ReplyDeleteplease check out my blog & maybe we can follow eachother?
http://simplebutreal.blogspot.com/
love the headband!!xx
ReplyDeletewww.zscloset.blogspot.com
I've learn several just right stuff here. Certainly worth bookmarking for revisiting. I wonder how much attempt you place to create one of these excellent informative website.
ReplyDeleteFeel free to surf my blog :: neucopia review
Thanks for your marvelous posting! I truly enjoyed reading it, you
ReplyDeletecould be a great author.I will be sure to bookmark your blog and will
eventually come back at some point. I want to encourage one to continue your great work, have a nice afternoon!
Feel free to visit my blog ... Spazio-kovan
I read this paragraph fully concerning the comparison of most
ReplyDeleteup-to-date and preceding technologies, it's remarkable article.
Also visit my blog :: HCG
Nice post. I was checking continuously this blog and I'm impressed! Extremely useful information specifically the last part :) I care for such information a lot. I was seeking this particular information for a very long time. Thank you and best of luck.
ReplyDeleteHere is my website; buy facebook likes on pictures
Thanks for one's marvelous posting! I genuinely enjoyed reading it, you may be a great author.I will remember to bookmark your blog and will often come back very soon. I want to encourage continue your great work, have a nice weekend!
ReplyDeleteHave a look at my blog :: http://www.cuteteenporn.net/video/8206/tanned-hot-teen-lesbians-masturbating-with-dildos-in-bedroom.html